Exocet Build Guide for MX-5 Mk3 donor cars
The launch of Exocet in 2010 created a storm in the kit car industry. Heralded as the new Lotus 7 with its true British sports car layout of front engine rear wheel drive and offering excellent value for money. One firm we can thank for keeping build costs low and less complex than anything else on the market place is Mazda who took our best of British sports cars and made them better and cheaper, now we take what they created and make it even better and cost even less! Over 1000 Exocet kits now sold, this is the most popular in the world, selling well in across the pond in the USA.
The MX5 is a great donor, modern engineering, excellent handling via double wishbones in each corner, discs all round, precise steering and a short shift gear box. These cars cover 250,000 miles with ease and have bomb proof engines that are easy to tune, perfect for an Exocet conversion! With over one million MX5’s sold we are never going to run out of donors and these sales figures ensure there is always competition in the spares market so running costs are kept in check. Good news when you strip your donor too as you will be surprised how much money you can get back for the parts you don’t need for your Exocet, these cars are worth more in parts than they are complete, cheers Mazda! Use a MKI or MKII, a MK 2.5 and also MK3.
Ten reasons why should you go down the Exocet route to build your own car.
-
The Mazda is 50% heavier than Exocet, put your MX5 on a diet.
No welding or special skills, just transplant parts to a new lightweight chassis.
Only basic tools are required plus the loan of an engine hoist to lift the MX5 body.
No nightmare electrics to face as we just plug the MX5 loom back in where it was.
Nothing to modify, standard MX5 exhaust, prop shaft, steering, brakes, pedals wiring harness, fuel tank, radiator, seats etc.
Costs kept low and convenient by even using minor items from the MX5 such as handbrake/throttle cables, instruments, switches and even the water pipes.
Ease of testing for road use items such as brake balance, self-centring, emissions, decibels, protective steering, speedo calibration are all type approved on the donor.
Large choice of great value donors, buy an MOT failure and throw away the rusty bits. BUT don’t forget to sell all the other parts you don’t need for Exocet.
Tons of tune up options available, super/turbo chargers, brake/suspension upgrades.
The MEV owner’s forum is a very friendly helpful place to share your experiences.
Worthy of note too is that Exocet provides a platform to create a unique vehicle, not just through the choices offered on our online configurator (see www.mevltd.co.uk) but via your own imagination. We don’t provide specific instructions on exactly how you should build your Exocet, we guide you through the process and hope that along the way you will spot areas where you can add your own ideas and create something unusual. After all it would be a real shame if 2 Exocets turned out to be the same as each other. This is an opportunity to express yourself, making the choice of colour, nose style and wheels is just the start. Just pick a budget and achieve a major accolade of driving you own creation.
MILLS EXTREME VEHICLES LTD, ITS EMPLOYEES AND REPRESENTATIVES WILL NOT BE HELD RESPONSIBLE FOR ANY LOSS OR INJURY HOWEVER CAUSED WHEN USING THIS GUIDE.
Now on to the build guide starting with a safe and healthy warning.
MEV EXOCET BUILD GUIDE
Stripping the MX5 MK3 (NC)
TAKE YOUR TIME AND TAKE CARE.
We assume that you will take all precautions and use proper personal protective equipment, ensuring you and anyone present is not in any danger. Obvious dangers include parts snapping, flying objects, heavy weights, sharp edges, fuel and electrics,
The suspension springs on MX5’s are highly preloaded, removing them with the body in place holding them down is the way to go in the absence of spring compress tools.
The donor is fitted with air bags so ensure the battery has been disconnected for an hour before removing them.
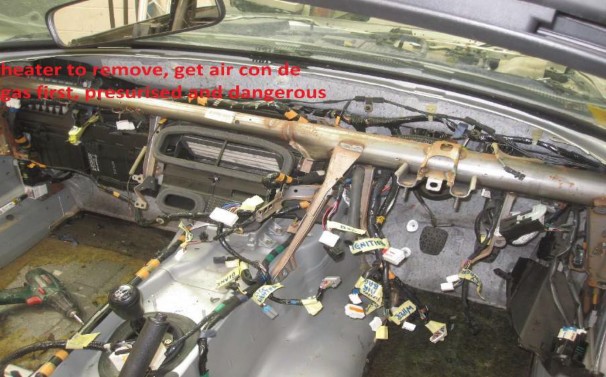
If the donor has air con then this needs the pressure releasing under control at the valve, not by cutting pipes! Get a pro in to do it, harmful gas!
Rear drive shafts are usually very tight, leave them in or you may be in for a battle.
Always have a first aid kit at hand and be in reach of a phone if working alone, always double check that your working environment is safe. You will need ear protection, eye protection and dust masks. You will also need axle stands, a decent jack and good quality spanners/tools that are up to the job. If bolts/nuts get tighter when coming out then wind them back in, clean the threads and spray releasing lubricant (WD40).
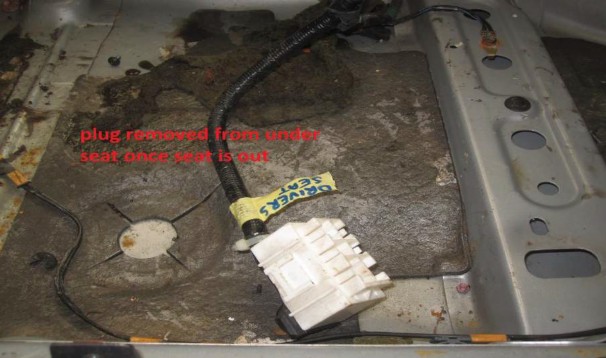
First job is to take out the seats, just 4 bolts and a plug to remove underneath.
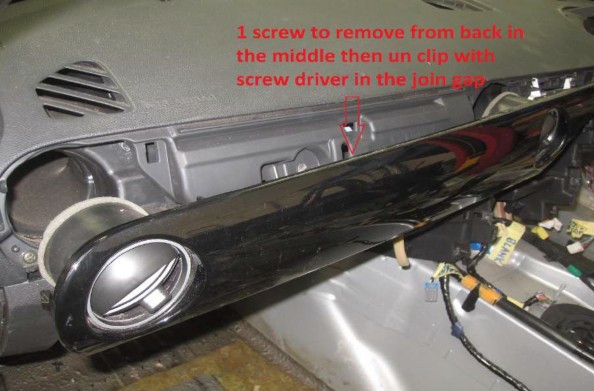
The dash needs to come out, first un-clip the facia, there is one screw in the middle at the back, accessed by ripping out the glove box and underside plastic panels.
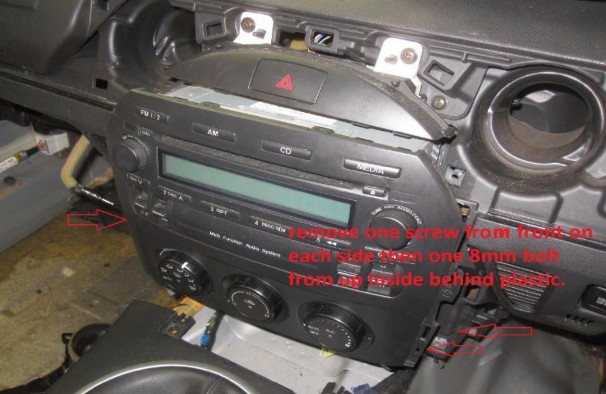
Hidden 8 mm bolt to find on the driver’s side of the radio and then 2 screws each side before it comes free.
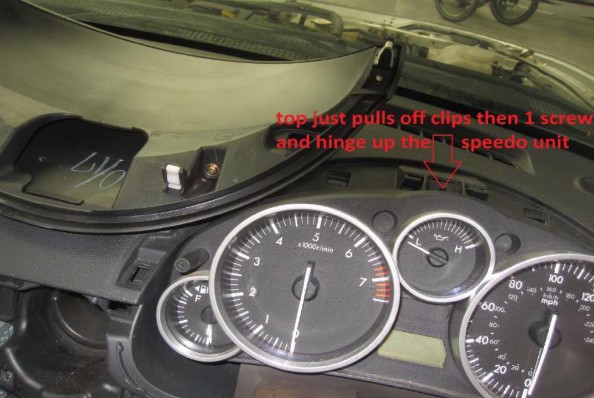
The speedo unit hinges up after you un-clip the lid and remove one screw at the top.
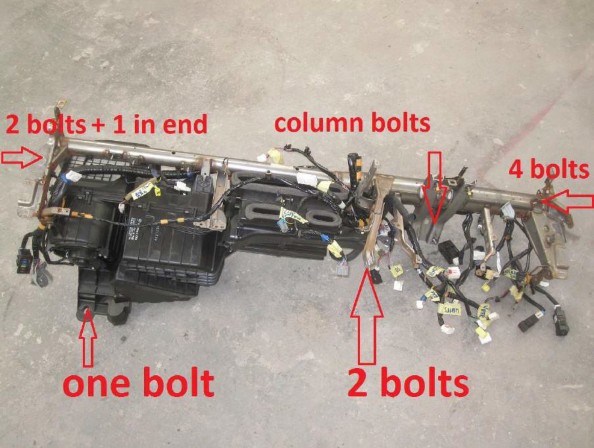
The steering column has 4 bolts plus all the electrics to unplug.

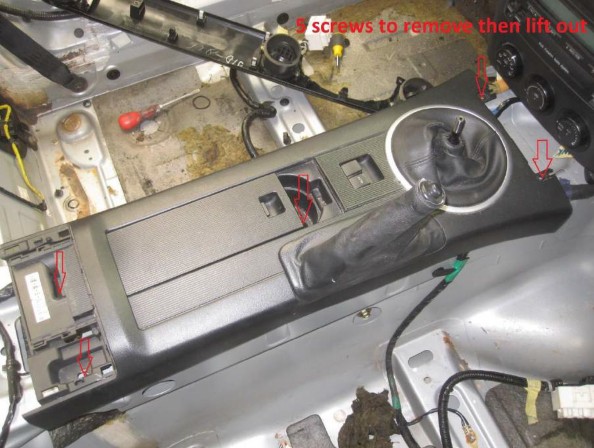
The centre console is easy to remove, 5 screws are hidden under plastic caps.
The top can come off next, just self-tap screws to remove.
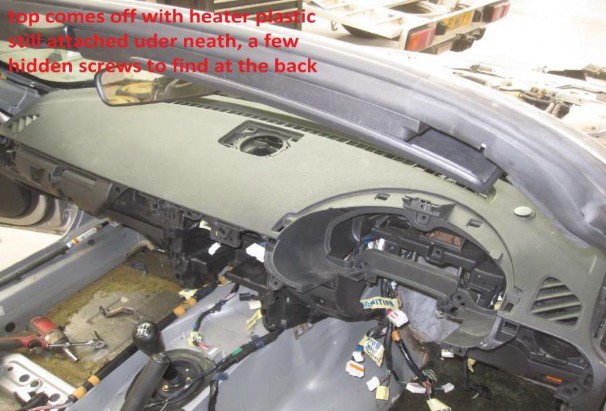
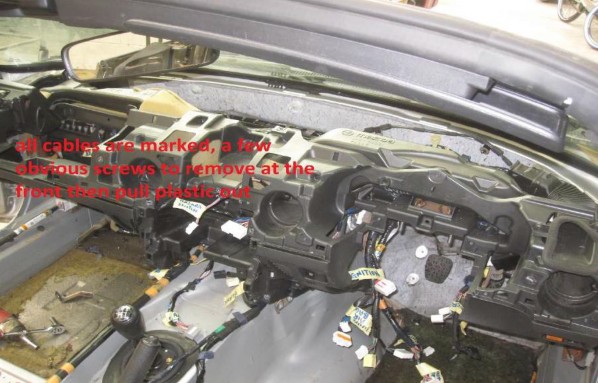
You can release the main plastic dash but you need to drag the air ducting with it, this has screws securing it underneath.
The air con pressurised gas should be removed by an expert as it is harmful. There are 2 bleed points under the bonnet.
7 bolts are behind the doors accessed from outside the car.
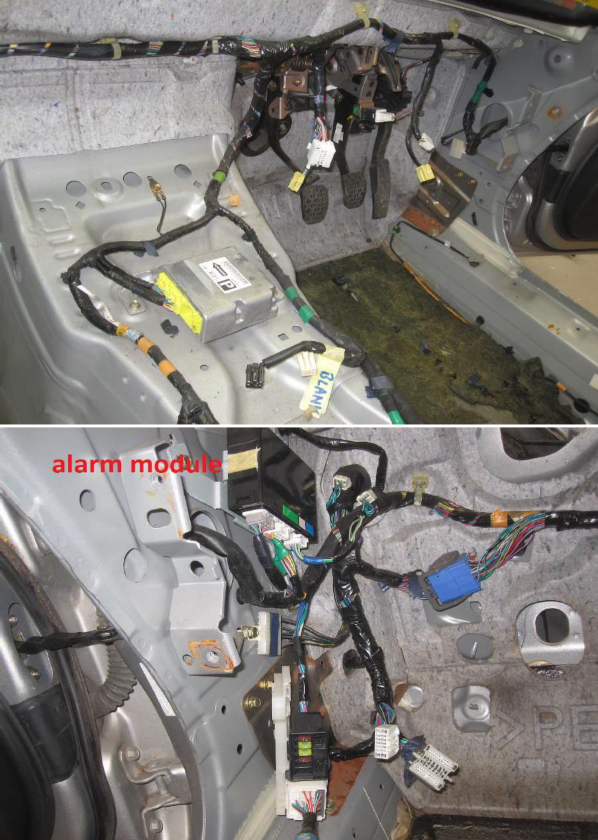
Now you can see the alarm module and air bag unit. Both can be unplugged and sold on. The car runs without them.
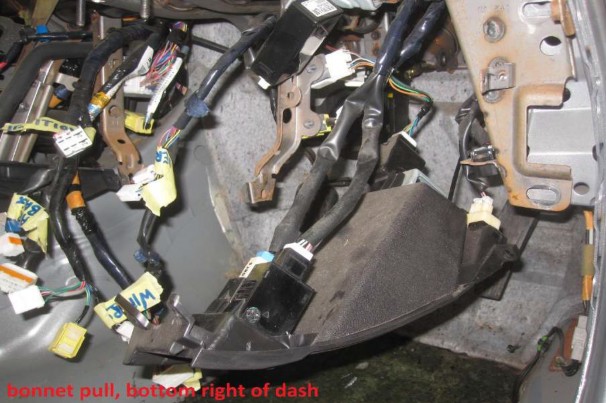
Doors are easy to remove, just one plug in the door pillar to pull. Under the dash you will need to remove the bonnet cable.
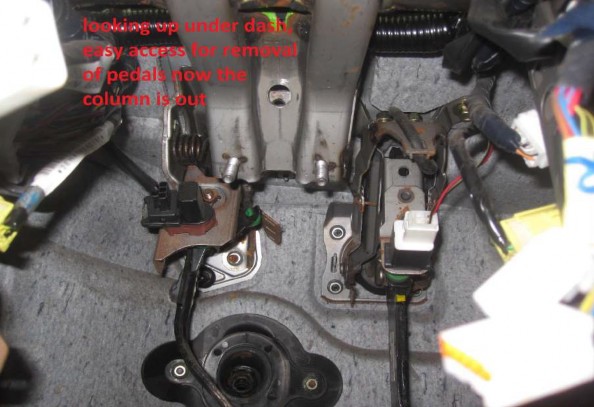
Just the pedal assembly to remove now.
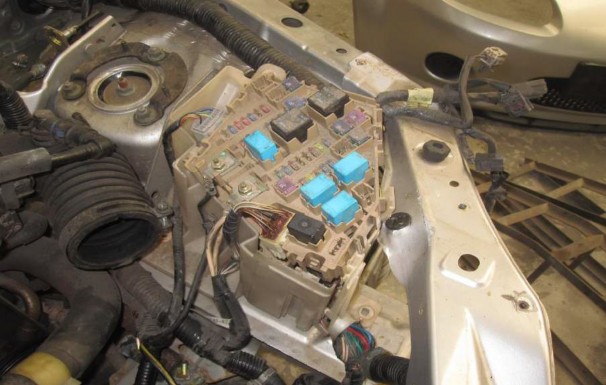
In the engine bay remove the main fuse/relay box and unplug it (+ 2 nuts) from the engine harness. Also unplug ABS unit.
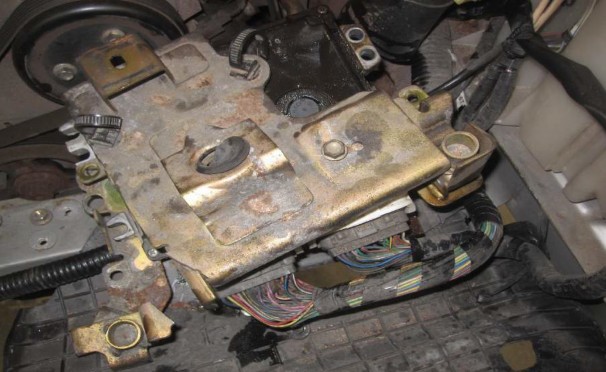
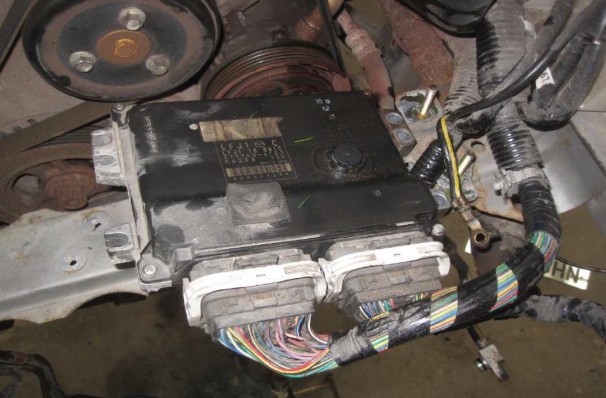
The ECU is hidden under the air box, removal requires special tools or an angle grinder. Careful you don’t cut you or wires.
Remove radiator brackets that are bolted to the front of the subframe to drop the radiator. Remove expansion bottle too.
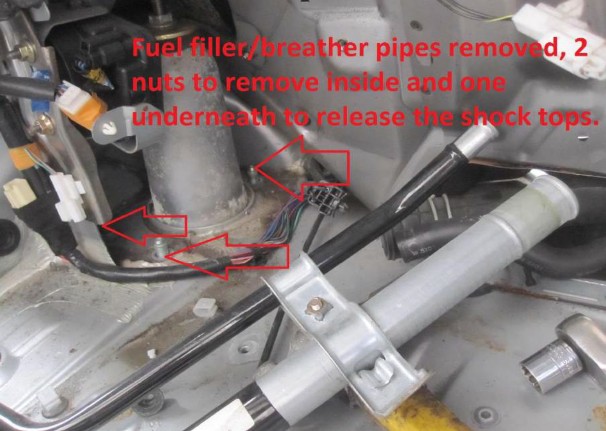
The fuel pipes are uncliped by rotating the platic rings. Also disconnect the clutch pipe and the heater hoses on the right.

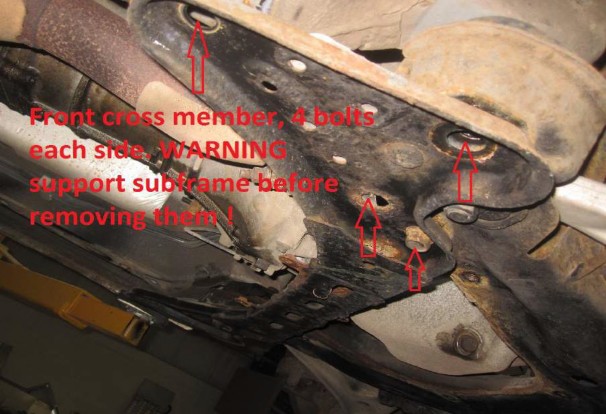
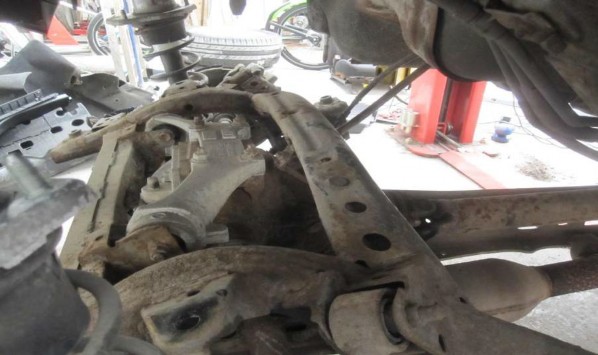
Remove the cross members on the front sub-frame which will still be held by the four main bolts behind the shock absorbers.
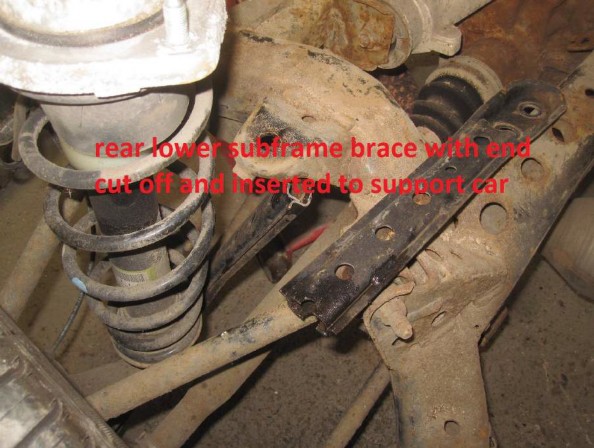
At the rear there are just 3 bolts either side plus 2 braces.
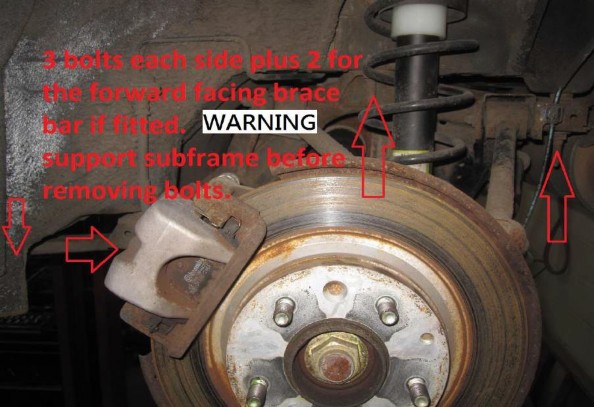
Nuts on top of shocks at the front are obvious, the rears not so.
Once the exhaust is removed you can access the handbrake cables and you will also need to remove the brake pipes before the lift off can commence, ABS plugs, also need to come out.
Lift commenced using a 2 poster, you could use an engine crane attached to a chain on the seat bolts or even cut the body in half with a 9” angle grinder to roll it off.

Once off you can retrieve the handbrake cables and fuel tank.

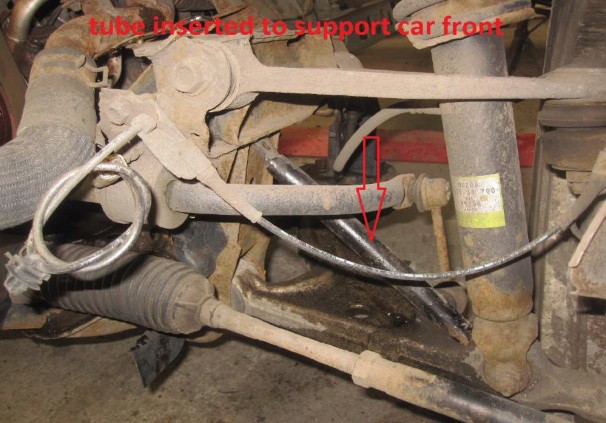
To move the “skate” around you can use steel tubes to support.
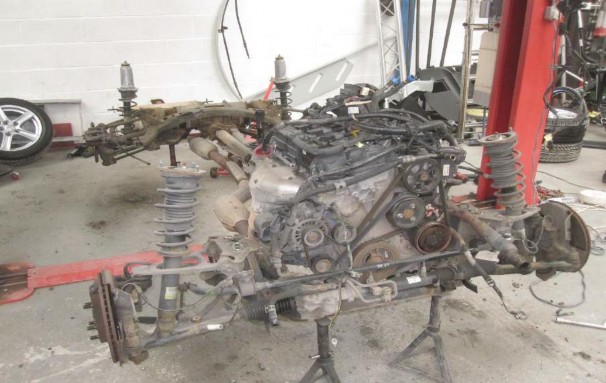
The whole assembly is now awaiting a little TLC, perhaps a wire brush and some black gloss paint too.
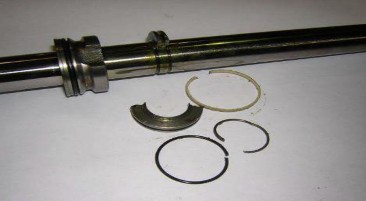
In the picture above you can see that we lifted the body off with the top bolt on the shock absorbers still on. To change the springs you now need spring compress tools The springs have loads of preload and can attack you.
Alternatively you could leave the top of the shocks attached to the body and remove the centre bolt before lifting the body. The springs then become loose as the body is lifted off.
Power steering can be retained or just remove the pipes or take out the ring inside the rack.
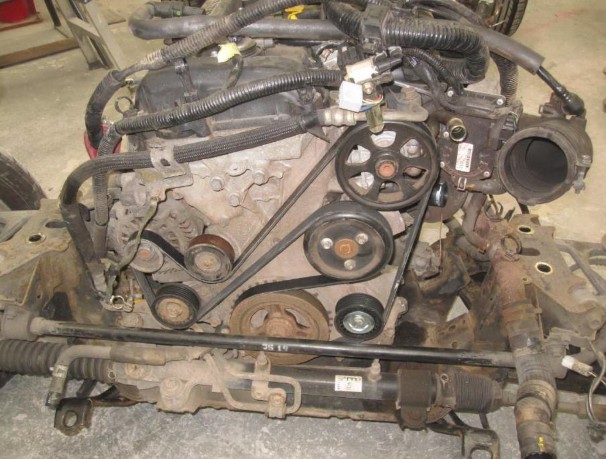
The air con radiator and compressor is not required so they can be sold but a replacement serpentine belt is needed and an idler pulley to replace the air con pulley position.
The replacement belt is a 6 rib 2160 mm long off the shelf.
A spare tensioner pulley is easy to source for £10-20 but you will also need a bolt and spacer to fit it to the hole that is provided in the block as shown below next to the crank pulley.
The only other modification is to join the feed and return pipes that were connected to the heater. You can either replace the pipe or fit a steel joining piece to the 2 halves. You may also need to shorten the lower main hose slightly.
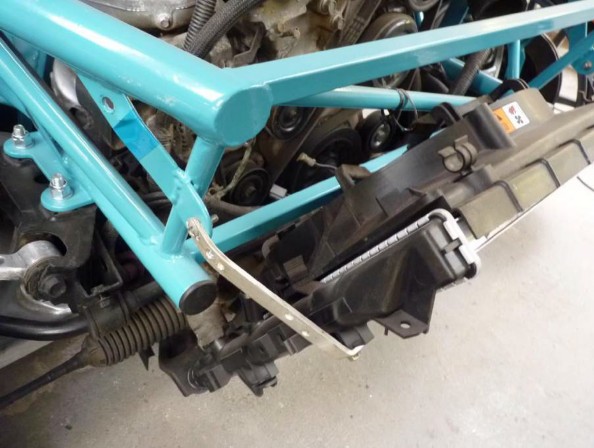
Brackets come with the kit to mount the MK3 radiator.
You will receive a bolt pack to secure the MX5 subframes to the Exocet chassis and rivets to secure the alloy floor to chassis.

Below you can see the rear wing stay attached, one bolt is on the brake caliper and one is drilled through the alloy rear upright and an 8 mm bolt is used.
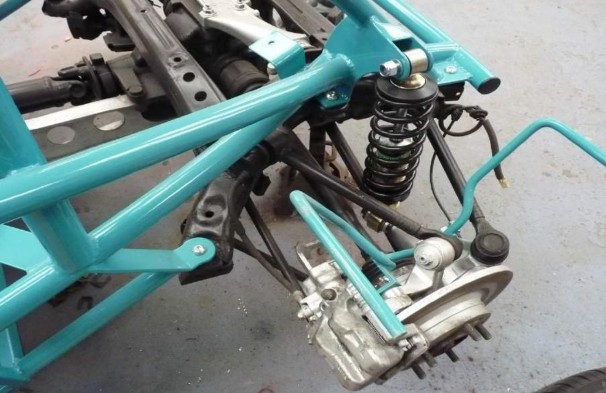
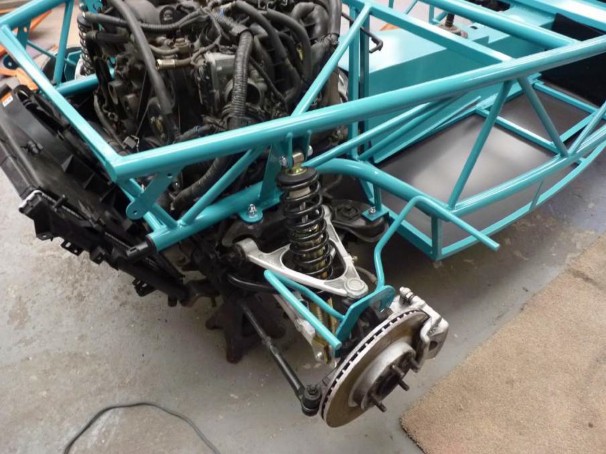
Below you will see the front wing stays mounted, again these use one bolt that secures the brake caliper and the other is bolted with a hub bearing bolt. Note the Gaz shocks.
Holes are drilled in the wings and then the stays are inserted, we usually use PU adhesive to secure the wings.

The engine bay is tidy, you will use the bottom radiator mounts that are bolted to the subframe on the donor, top mounts for the radiator will need making from alloy strap say 30x3 mm.

MK3 seats runners will need modifying as above. 6 mm threaded bar between the 2 rails inserted into an alloy tube.
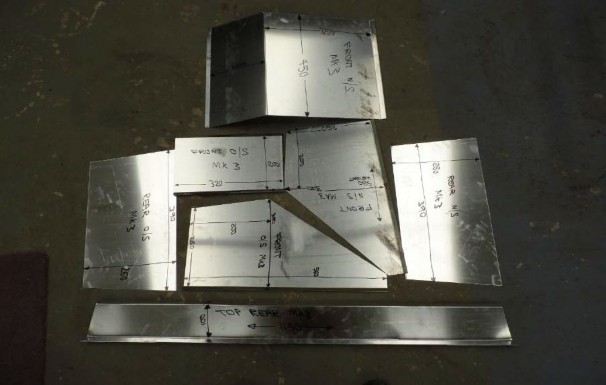
The alloy panels included in the kit are shown above, they will need fine tuning to fit tight in your chassis, best to use a piece of stiff card to make accurate templates before cutting the alloy.

The MK3 dash fits nicely in the MEV dash pod, just a slight use of a bobbin sander required in the 2 lower corners.

The side panels look great but they do require a lot of trimming.
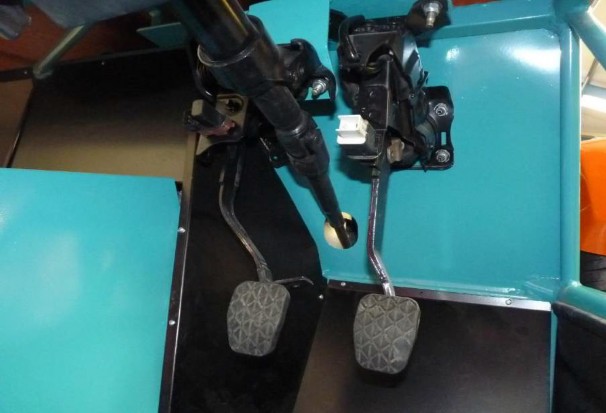
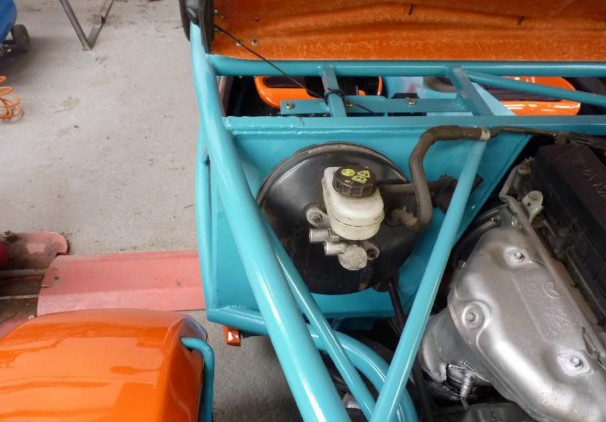
Above you can see how easy it is to fit the brake servo and pedal assembly. Throttle pedal will need a small bracket.

Above you can see the LED stop tail indicator units. Also note that the reverse light goes this side so that the fog will be mounted offside.

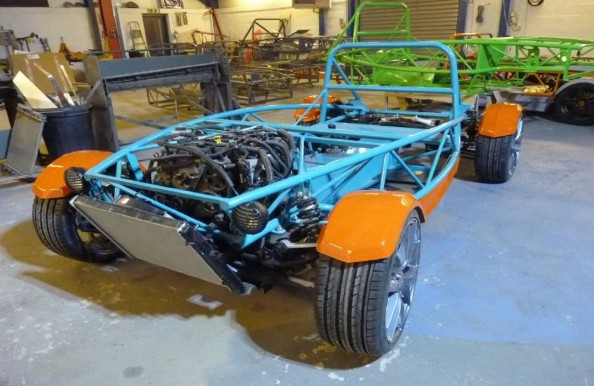
The wheels are oversize on the car above, we recommend you use 225/40 R16. You will not require wheel spacers.
© 2022 Freakyparts Ltd. c/o MEV Kit Cars.